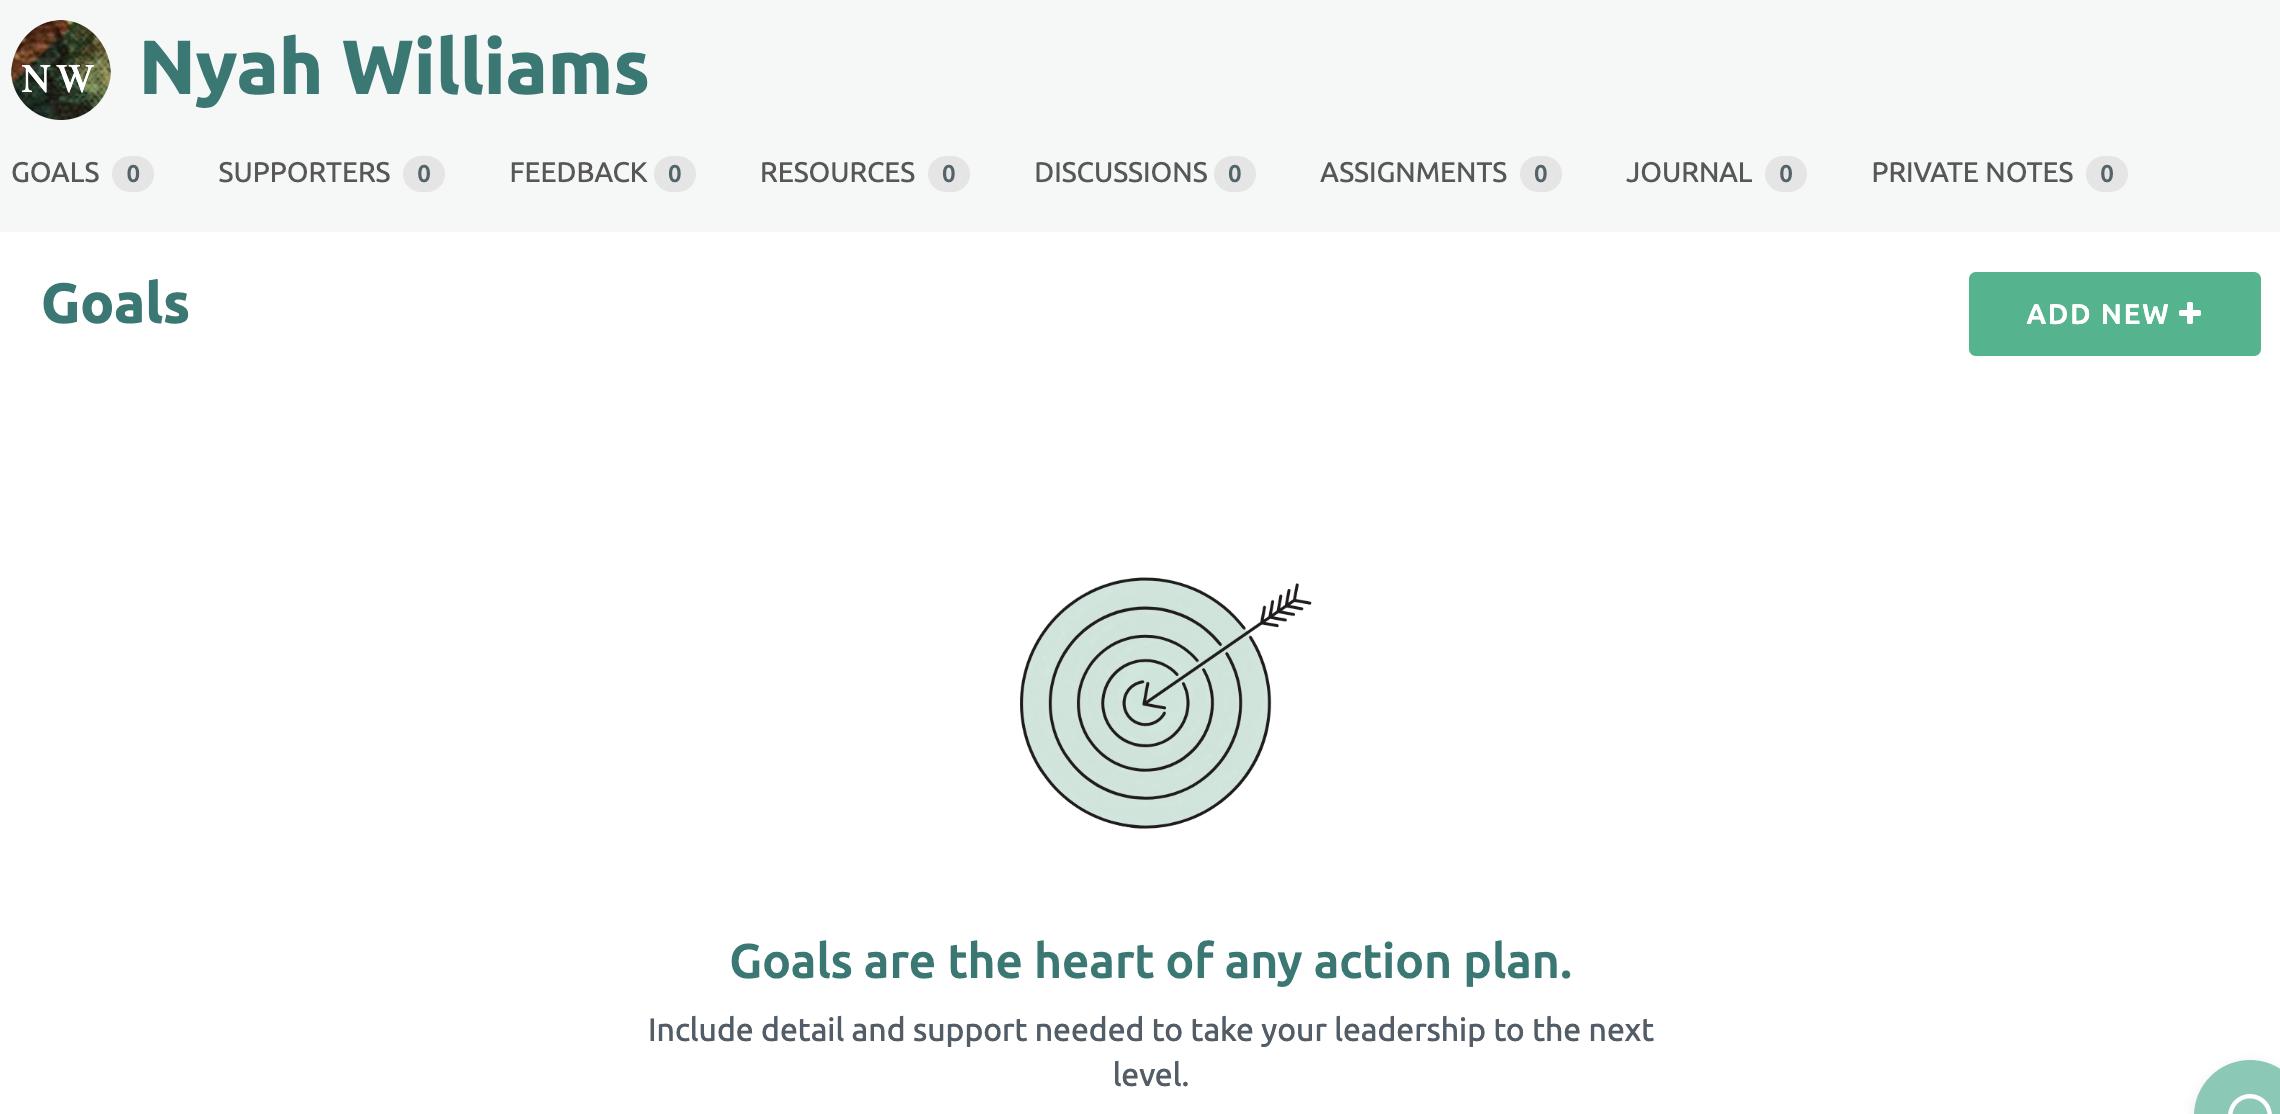
To create Goals within the Action Plan, first select the Participant's tile.
Either the Coach or the Participant can create and edit Goals.
On the Participant's page, click on the “Add New +” in the upper right corner to create a new goal.
Developing the Action Plan
Either the Coach or the Participant can create and edit the action plan.
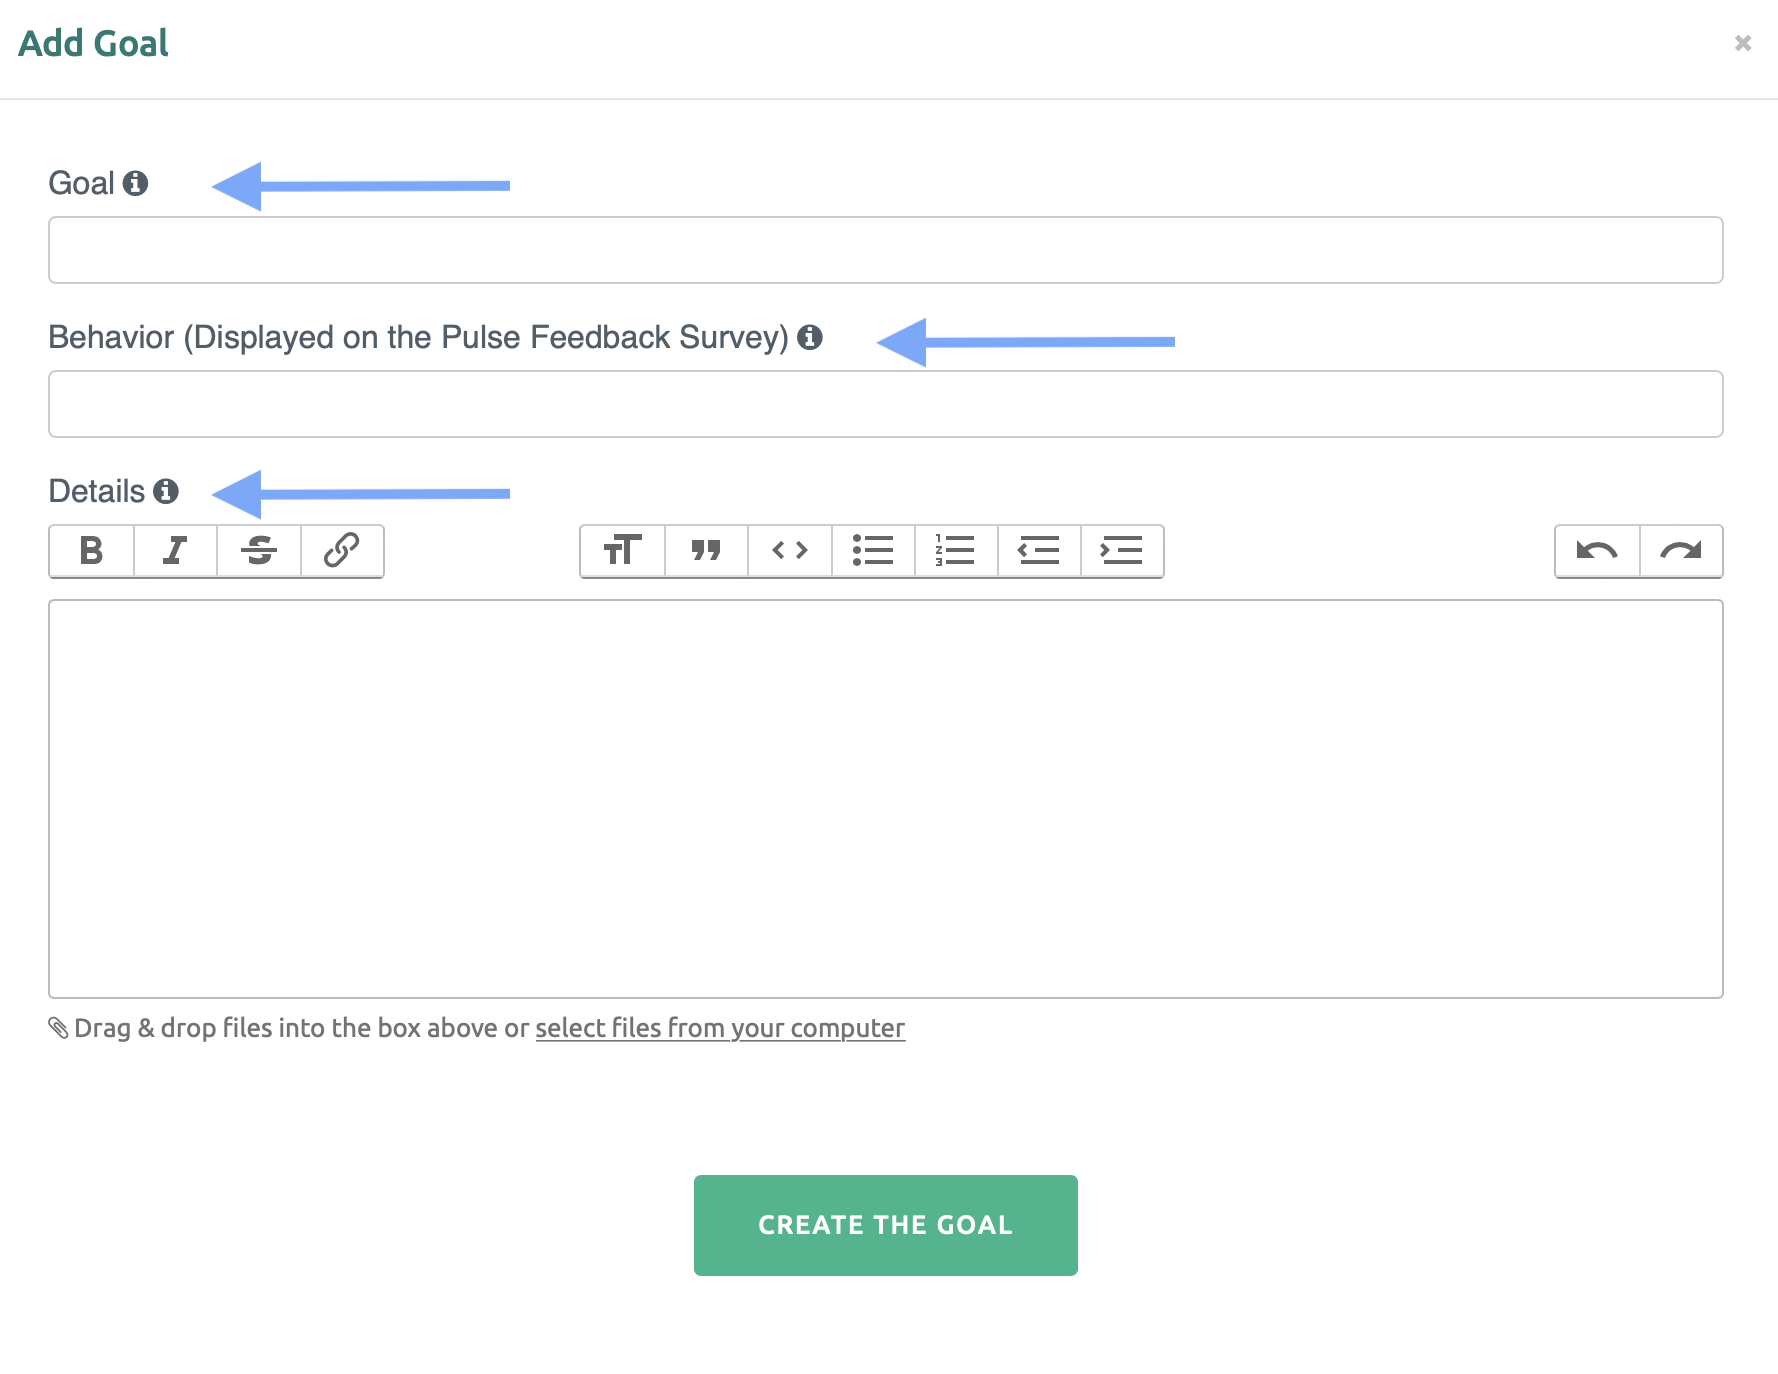
If you hover over the information icon, detailed guidance is displayed.
The Goal Statement should be created to be SMART:
- Specific
- Measurable
- Actionable
- Realistic
- Time-oriented
The Goal cannot be changed once the Pulse Feedback has begun.
- Observable by others.
- Important enough to make a critical difference in the Participant's success.
- Action oriented.
The Behavior cannot be changed once the Pulse Feedback has begun.
Using the Details Text Box
The Details text box should be used as working space to go into depth on each goal. It could capture specific Action Items or call out support that is needed.
It can support files, image, or screenshots.
This information can be updated throughout the engagement to ensure there is clarity and accountability.
Assigning Supporters to Each Goal
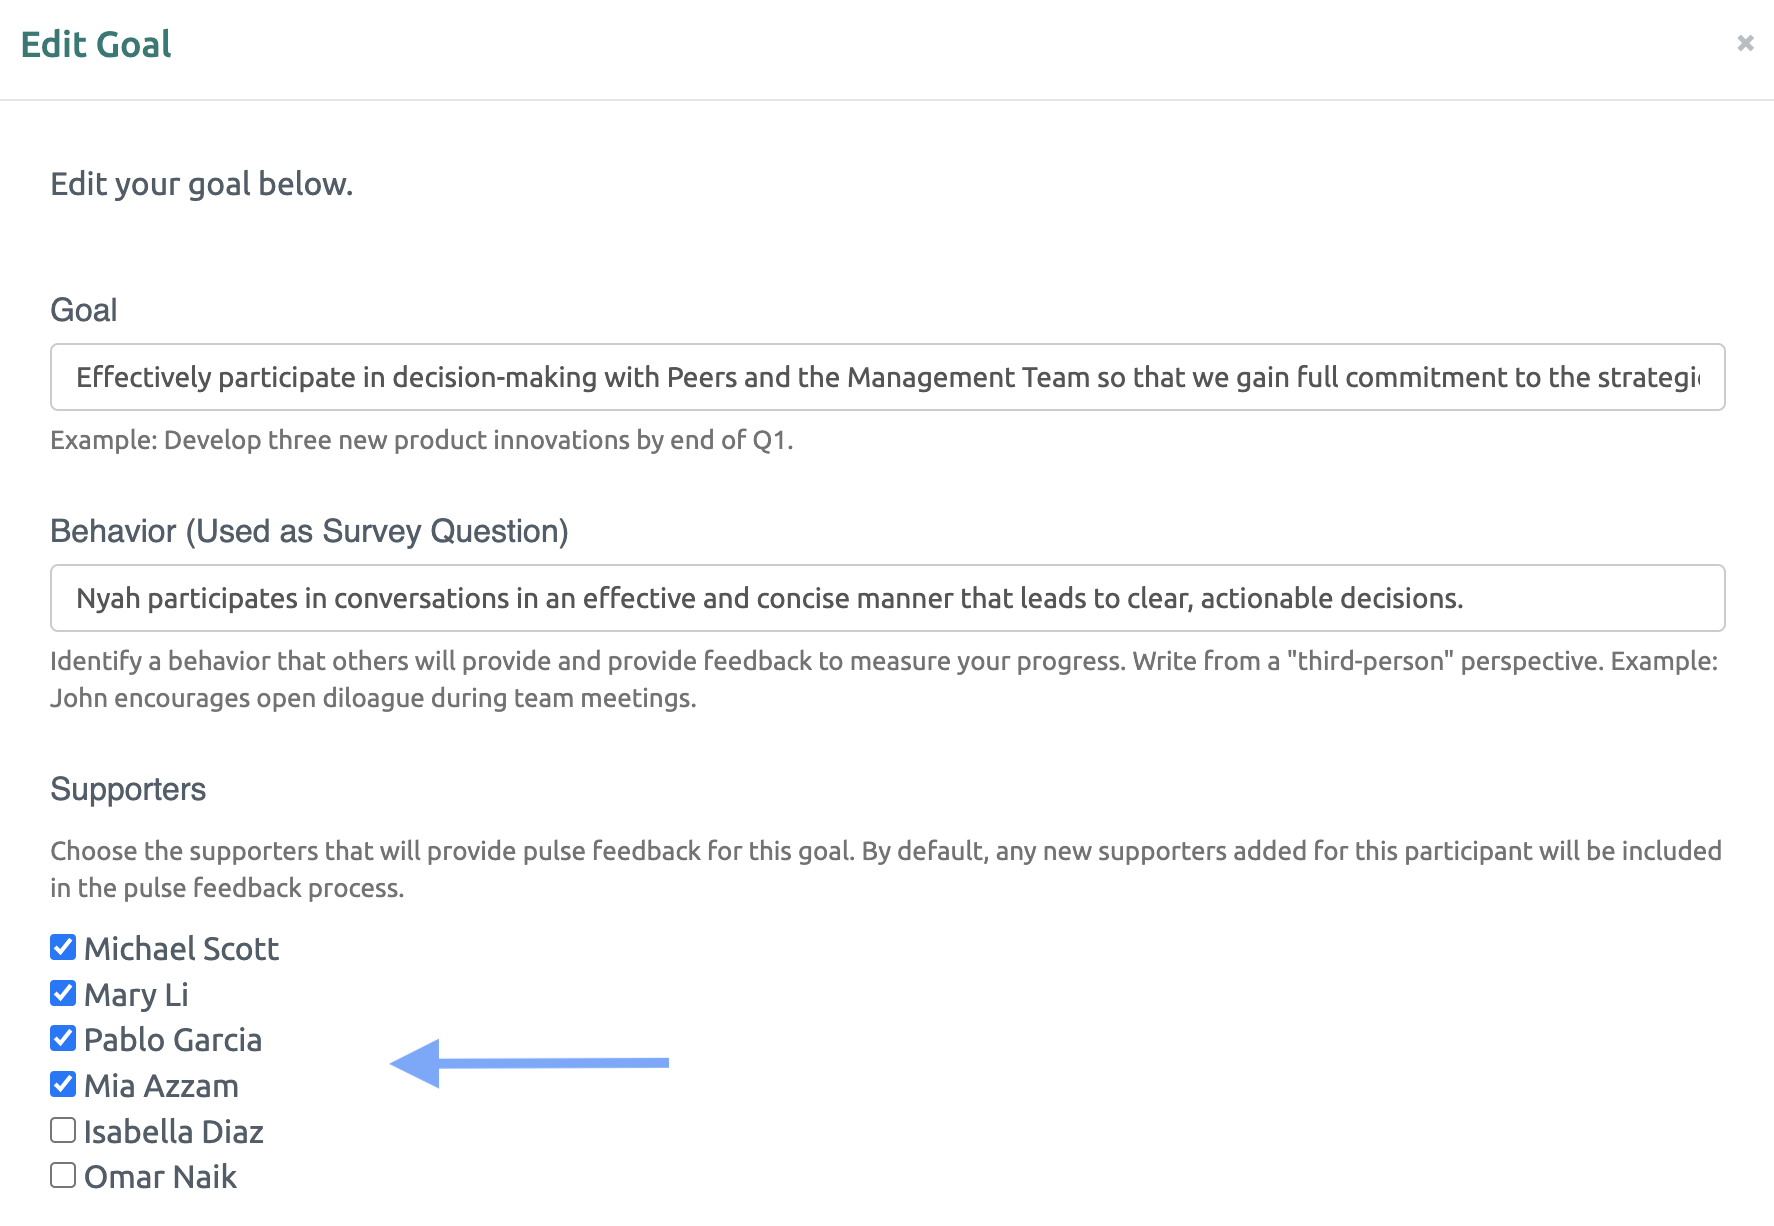
Once the Supporters have been added to the platform, (See article: Add Supporters ) they are assigned to goals.
By default, all of the Supporters are assigned to each of the goals. To select which Supporter is assigned to a goal, return to each goal to edit. (First click on the goal, then click the pencil icon to edit.)
Check the box next to the names of the Supporters that are directly impacted by the specific behavior of the goal.
When finished, click "Save the Goal" green button at the bottom.
Multiple Iterations to Complete
The Action Plan will likely be revised and refined multiple times. Remember, either the Coach or Participant can edit the Goal. First select the Goal, then click the pencil icon to edit.
Once the Action Plan is finalized, the Pulse Feedback process can begin.


